
When I first became a Thermomix Advisor I was often telling people “did you know that you can cook a whole chicken in the varoma?” – a question that was often greeted with astonished looks. “It’s true” I’d say, “I haven’t tried it but…”.
To be honest my Husband does a great roast chicken, so it was something that I had simply not got around to trying for myself. I decided that since I was always telling people it was possible I had better put my chicken where my mouth was and give it a go.
That is ancient history now. I finally did try it and we are long since converts to “Whole Varoma Chicken”; even the roast king agrees that they are superior and it is now our standard way to cook a chicken.
The first time I tried this the chook came out so tender that when I tried to lift it out of the Varoma one leg just fell off, thus it is now known in our house as Legless Chicken.
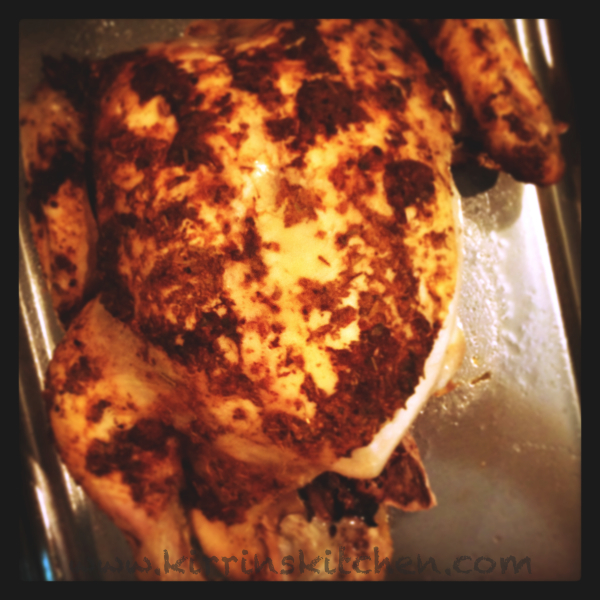
The original Legless Chicken
There’s no particular secret to Legless Chicken. Just season it with your preferred selection of herbs and spices and bung it in there. Once it’s done if you want to give it a bit of a sun tan you can pop it in a hot oven for 5-10mins while you make the gravy.
I’m often still telling people how to do this so I thought it was about time I wrote it down. So here you go – Legless Chicken.
Preparing your chicken:
- Remove the ankles – If your chicken still has it’s ‘shins’ attached to the end of the drumsticks (a common way to find them in the UK), get a bit vicious with it and using some kitchen shears cut them off. When attached they tend to be packaged stuck inside the cavity and push the breasts up higher which can make it tricky to get the lid on the Varoma properly.
- Get a bit stabby with it – Using a small sharp knife give it a bit of a jab all over, not too deep. This will help the flavours go into the meat.
- Dress the Chicken – Coat the chicken in your favourite seasoning. I make a paste of lemon juice, paprika and dried mixed herbs and spread it all over. The Paprika gives it a bit of colour.

- Place the Chicken into the Varoma.

Cook your Chook
- Add 1.5L water to the cooking bowl.
- Put on the lid, place the Varoma on top (no MC obviously) and cook 1hr – 1hr20 on Varoma temperature at Speed 2.
– 1 hr for a 1.2kg – 1.4kg chook
– 1 hr 10 mins for a 1.6 – 1.8kg chook
– 1 hr 20 mins for a 2 – 2.2kg chook (nb you will have a hard time fitting a chicken this big into the TM31 Varoma, the TM5 will comfortably hold a 2kg bird). - When cooked, if you want crispy skin then place it into a hot oven for 5-10 mins. If you don’t plan on eating the skin, don’t bother.

Tips & Notes
- When finished, the cavity will have a pool of liquid inside. Tip the chook up to drain before lifting it out.
- The chook will be very tender. I use a big pair on tongs gripped in the cavity to hold it but it can be a good idea to also slide a spatula/egg lifter underneath to assist when lifting it out.
- You will have up to 1 litre of delicious chicken stock left in your cooking bowl. Use some to make your gravy, and/or save it for the next day’s risotto or soup.
You’re welcome 😉

Weve only had our thermomix for a few months and I keep reading people say theyve cooked a whole chook in it .. Im going go give thid a shot with your directions – thank you!
LikeLiked by 1 person
Yes you really have to try it! It took me a while to be convinced but I’m so glad I did. I’ve since started trying to steam other meats with some trepidation but it works quite well. Have a look at my Sweet & Sour Pork. I was nervous but it is so tender!
LikeLike
Pingback: Varoma Chicken | Thermomix with Emma Payne